
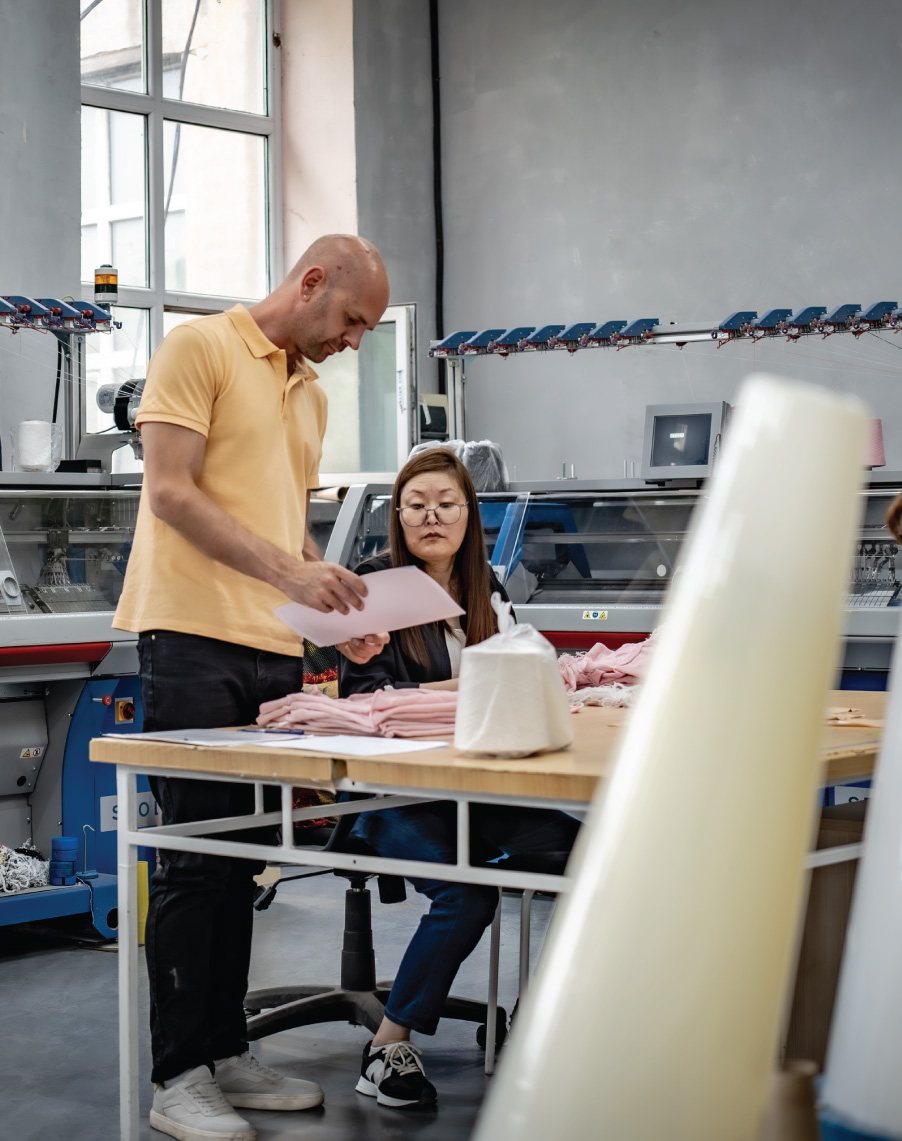
No need to be a technician. Just a clear idea of where you want to go.
A tech pack is the document a factory works from. It sounds technical. It does not have to be.
Most of what makes a knitwear tech pack technical (gauge, yarn count, stitch calculation, machine programming) is our work. Your part is simpler: tell us what you have in mind, show us what you like, and give us a few measurements.
Here is how it works, from the side of the people who read tech packs every day.
Start with words, not jargon
Every project can start from a conversation. Simple words already say a lot: thick or thin, fluffy or flat, close to the body or relaxed.
Our role is to turn those words into technical choices.
| You say | We translate it into |
|---|---|
| Thick and cosy | A low gauge (3, 5 or 7) and several yarn ends knitted together |
| Fine and light, almost like a shirt | A high gauge (12 or 16) and a finer yarn |
| Fluffy, soft, a little hairy | A brushed or milled finish, or a fibre with more loft |
| Flat, clean, smooth | Plain jersey, firm tension, a light wash |
| Textured, with relief | Ribs, cables or a structured stitch |
Knowing a little about where you want to go is enough. The rest is our job.
10 to 15
measurements for a sweater
1,000+
stitches our machines can knit
1 to 2
weeks to a first prototype once the brief is clear
What a good tech pack contains
Start with the first two. The others make each step faster.
01
A few words about the feel
Thick or thin, soft or crisp, fitted or loose. Three or four words already set the direction.
Start here
02
Pictures
Anything that shows the idea works: a photo found online, a picture of a real sweater you own, a quick sketch. Several pictures can be combined, the collar from one and the sleeve from another. We build the model from there.
Start here
03
Measurements
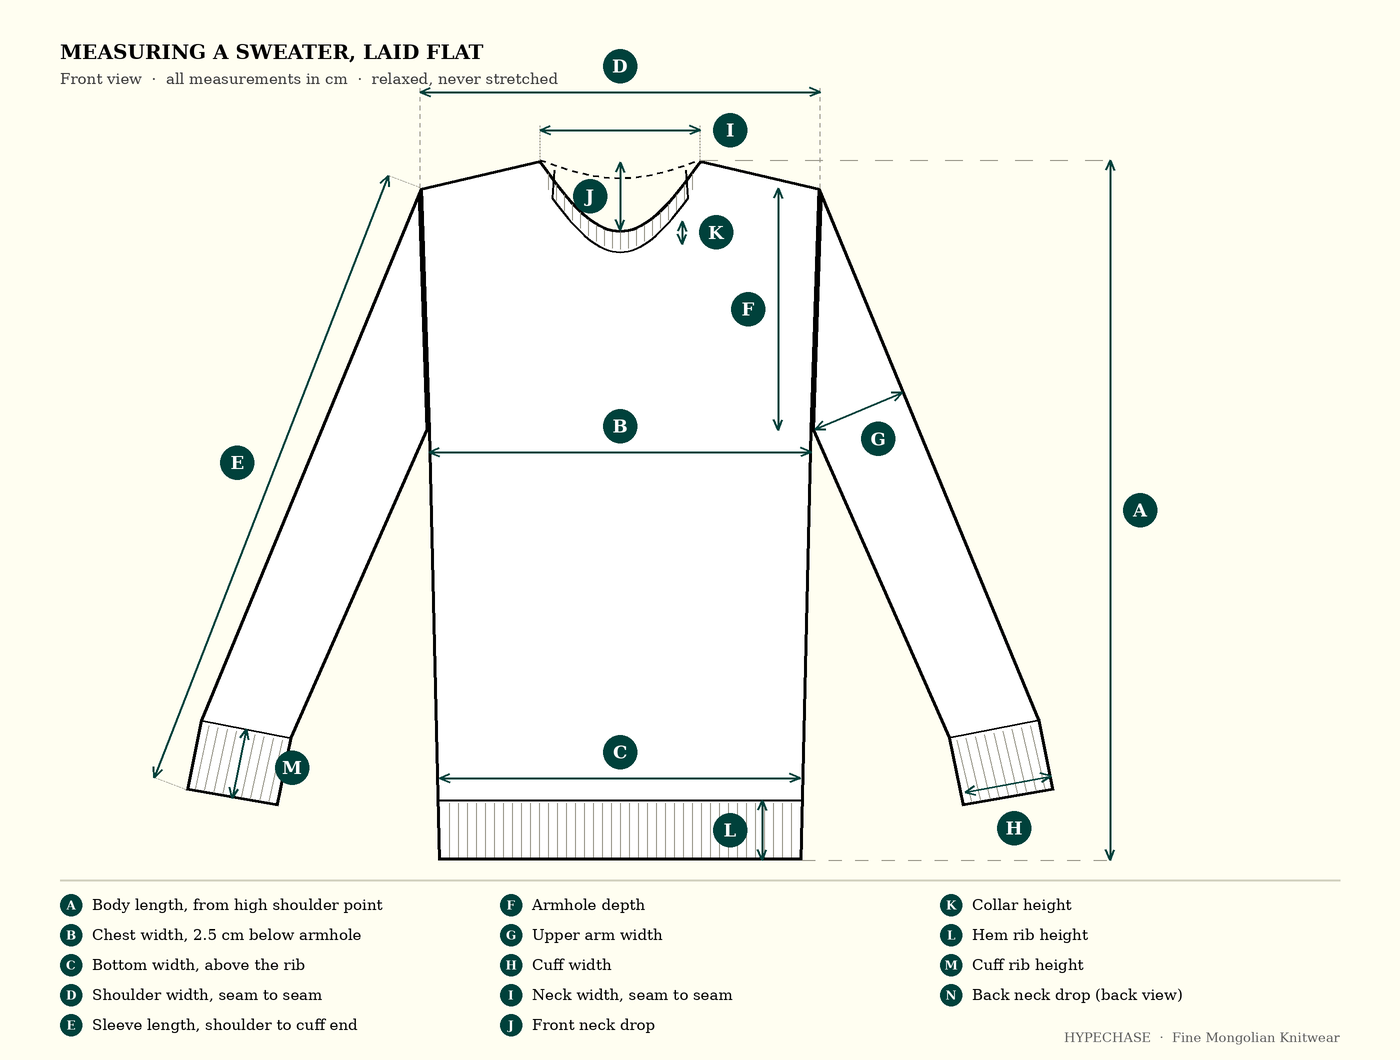
About 10 to 15 measurements, taken on the garment laid flat on a table. Patterns, shaping and cutting stay on our side.
Essential
04
The stitch
A close-up photo of the stitch is often enough. Our machines knit more than a thousand different stitches, so a picture lets us identify it and reproduce it.
Essential
05
Notes on the picture
Write directly on the image or the sketch. “More tension here.” “Looser here.” “This part can be open.” A few words show the intention behind the shape.
Helpful
06
Looks and draping
A sketch on a silhouette, or a photo of how the piece falls on the body, shows what measurements alone cannot: volume, drape and movement.
Helpful
07
Versions
The first version holds the starting measurements. After the first prototype comes a fitting, then a second set of measurements. Each version stays in the same file, dated.
Helpful
08
Production details
Colours, sizes, labels and packaging. These can come later, once the prototype is approved.
For production
Where to measure a sweater
Lay the sweater flat on a table, relaxed, and measure without pulling. Knit stretches, so a gentle hand gives the right number. These are the usual points:

Spotlight
From fitting to fitting
Sometimes the first prototype is right straight away. Sometimes it takes two or three fittings.
Each fitting brings the model closer. A sleeve gets shorter. A collar gets softer. The body gains a little room. Round after round, the garment comes closer to what you had in mind, until it is exactly right.
This is a normal part of the work. A clear tech pack simply makes each round shorter.
Even simpler for accessories
A scarf, a hat or a pair of gloves needs far fewer details. A length, a width, a picture of the stitch and a colour are often all it takes.
Five small things that save a sample round
- A photo of the stitch. One close-up says more than a long description.
- Measurements taken flat. Garment on a table, relaxed, never stretched.
- A reference garment. A sweater you love is the clearest brief for hand and fit.
- Notes where it matters. A few words on the picture show where it should be tight, loose or open.
- One file, several versions. Keep each fitting’s measurements and comments together.
No tech pack yet? Start with what you have
Many brands start with an idea, a few pictures and a conversation. That is a perfectly good starting point.
You bring
A starting point
- An idea, a few words about the feel
- Photos of garments you like, or a sketch
- Target sizes, colours and quantities
We prepare
The technical package
- Measurement drawing and chart
- Gauge, yarn and stitch proposals
- Patterns, calculation and machine programming
- A first prototype in one to two weeks
Download a tech pack template
To make it concrete, here is the simple format we like to receive. Use the blank version for your next style, or open the example to see a finished one.
Template
Blank tech pack
Five short tabs to fill in: style and feel, measurements, stitch and details, pictures, versions. The measurement drawing is included.
Example
Filled crew neck
The same file, completed for a cashmere crew neck sweater, with a first fitting already recorded in version 2.
Quick checklist
- A few words on the feel and the fit
- Pictures: online references, real garments or sketches
- 10 to 15 measurements, taken flat
- A photo of the stitch
- Notes on where to add tension, ease or openings
- A look or a draping reference
- Versions dated in one file
A good tech pack does not need to be technical. It needs to be clear.
Common questions
Do I need to be an expert to write a tech pack?
Not at all. Simple words, pictures and measurements are enough. The technical translation is our part of the work.
Can I start with only a photo?
Yes. A photo of a garment, from the internet or from your wardrobe, is a good starting point. Several pictures can be combined into one model.
How many measurements do I need?
About 10 to 15 for a sweater. Fewer for a scarf or a hat.
How many fittings does it take?
Sometimes one. Often two or three. Each fitting refines the model until it is right.
What software should I use?
Whatever you already use. A PDF, a slide deck, annotated photos or our Excel template all work.
Start your knitwear project
Have a tech pack, a sketch or only an idea? Tell us where you want to go, and we take it from there. Production starts from 50 pieces per style, across sizes and colours. Discover our private label service, read how a cashmere sweater is made, or see why we work with a 50-piece minimum.